How To Arrange Flowers In A Vase
A practical step-by-step guide to how to arrange flowers in a vase, including preparation, instructions, common issues, tips, and next steps.
How To Arrange Flowers In A Vase
Transforming a simple bunch of flowers into a stunning centerpiece is easier than you think. This guide walks you through the simple, professional techniques for arranging flowers in a vase to create a beautiful display that lasts longer. Whether you've received a gift bouquet or picked some stems from the garden, learning these steps will help you craft arrangements that look full, balanced, and effortlessly elegant for any occasion.
Fast Answer
- Prepare your stems: Cut at a 45-degree angle and remove all lower leaves.
- Build a base: Start with foliage, crisscrossing stems to create a supportive grid.
- Add focal flowers: Position your largest, most eye-catching blooms first.
- Fill in the gaps: Weave in secondary flowers and smaller fillers for colour and texture.
- Rotate and adjust: Turn the vase as you work to ensure the arrangement is balanced from all sides.
Before You Start
Gathering your tools before you begin makes the process smooth and enjoyable. Having everything to hand means your flowers spend less time out of water, which is key to a long-lasting arrangement.
- Fresh flowers of your choice
- A clean vase, chosen to suit the size and style of your flowers
- Sharp floral scissors, secateurs, or a sharp knife
- A sachet of flower food
- Fresh, lukewarm water
- A bucket or clean sink for conditioning flowers
- Optional: Clear waterproof tape for creating a grid on a wide-mouthed vase
Step-by-Step Instructions
Clean, Condition, and Hydrate Your Flowers
Your flowers have been on a journey to reach you, so their first need is a long, refreshing drink. This initial conditioning step is vital for ensuring they are fully hydrated and ready for arranging.
First, fill your clean vase or a bucket with fresh, lukewarm water and mix in the provided flower food sachet. Carefully unwrap your flowers, removing any plastic or paper sleeves. Before placing them in the water, you'll need to prepare each stem. Use your sharp scissors or knife to remove any leaves or foliage that will sit below the waterline in your final arrangement. Submerged leaves will rot, creating bacteria that will shorten the life of your entire bouquet.
Once the lower leaves are removed, give each stem a fresh cut and place it immediately into your prepared water. Let the flowers rest and hydrate for at least an hour, or even a few hours, before you start arranging. This allows them to perk up and regain their strength.
Trim Your Stems to the Right Length
The height of your arrangement is the first major decision you'll make. A good rule of thumb for a classic look is that your tallest flower should be about 1.5 to 2 times the height of your vase. This creates a pleasing proportion and prevents the arrangement from looking too squat or too sparse.
Take one stem at a time from your conditioning bucket. Hold it against the outside of your vase to gauge the final height, then trim it to your desired length. Always cut the stem at a sharp 45-degree angle. This simple trick maximises the surface area for water absorption and prevents the stem from sitting flat on the bottom of the vase, which could block its access to water. If possible, make this cut under running water or with the stem submerged in a basin to prevent air bubbles from entering and creating a blockage.
Build a Structural Base with Greenery
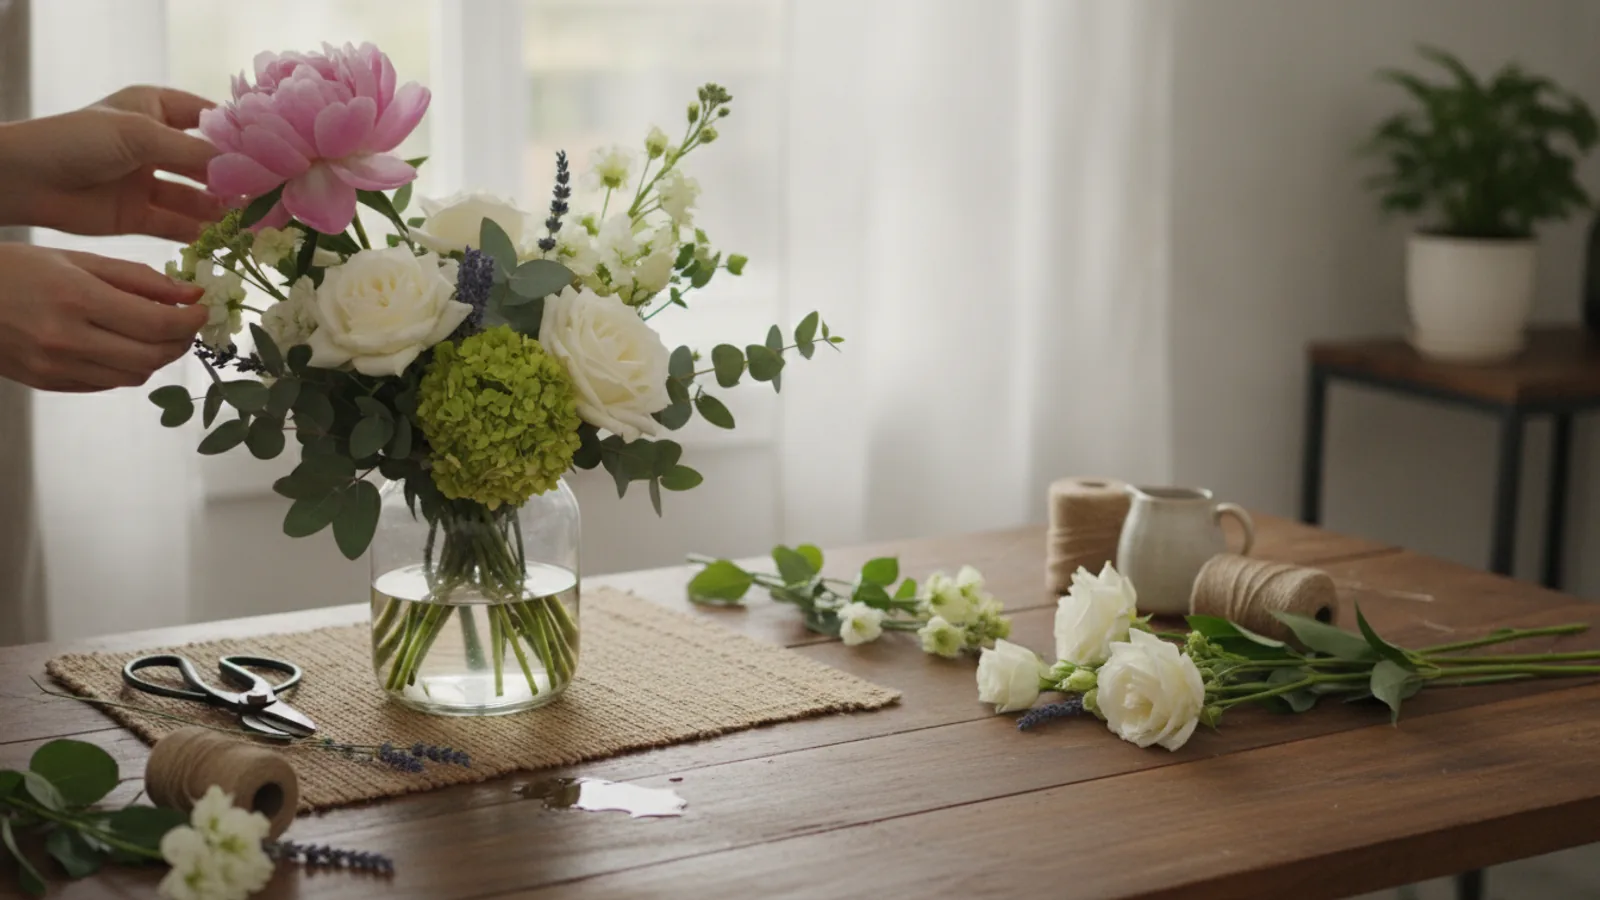
The secret to a stable, professional-looking arrangement isn't foam—it's a well-built foundation of foliage. Start by taking your sturdiest greenery stems, such as eucalyptus, ferns, or salal leaves. Trim them and place them in the vase, intentionally crisscrossing the stems below the water level.
As you add more stems, they will interlock to form a natural grid or web inside the neck of the vase. This structure will provide support for your more delicate flower stems, holding them in place and preventing them from flopping to the sides. This technique is especially important for vases with wider mouths.
Place Your Statement Blooms
Now for the stars of the show! Your "focal" or "face" flowers are the largest, most dramatic blooms in your bouquet—think roses, lilies, peonies, or large gerberas. These will be the main points of interest that draw the eye.
Start by placing your focal flowers into the foliage grid you've created. Cut their stems to varying heights to create depth. A common design principle is to use an odd number of these blooms, such as three or five, and arrange them in a loose, asymmetrical triangle. This creates a sense of natural balance. As you place them, start turning the vase. This is crucial for ensuring your arrangement looks good from every angle, not just the front.
Weave in Your Secondary Flowers
Secondary flowers are your mid-sized blooms, like carnations, alstroemeria, tulips, or spray roses. Their role is to add colour, shape, and body to the arrangement, filling the space between your focal flowers.
Continue to turn the vase as you work. Place these secondary stems in the gaps, tucking them in and around the focal flowers. Again, vary the stem lengths. Some can be nestled deeper into the arrangement to create fullness, while others can stand a bit taller to add dimension. Think about how the colours and shapes interact. Grouping two or three of the same type of secondary flower together can often create a bigger impact than dotting them around individually.
Finish with Fillers and Textural Elements
The final layer is all about texture and detail. Filler flowers are typically small, airy blooms like gypsophila (baby's breath), waxflower, statice, or solidago. Their job is to fill any remaining small gaps and soften the overall look of the arrangement, giving it a lush, completed feel.
Tuck these delicate stems in last. You can use them to add a bit of height, create a wispy, romantic feel, or simply ensure there are no awkward empty spaces. This is also where you can add interesting textural elements like berries, seed pods, or delicate grasses. Step back one last time and view the arrangement from a distance to see if any final tweaks are needed.
Quick Reference
| Situation | Use this | Why |
|---|---|---|
| Vase has a wide opening | A foliage grid or tape grid | It creates a supportive structure that stops stems from splaying outwards and flopping over. |
| Tulips are drooping | Prick the stem with a pin just below the flower head | This can release trapped air bubbles in the stem, allowing water to flow freely to the head. |
| Woody stems like roses | A sharp 45-degree angle cut | It maximises the surface area of the stem's "xylem" for better and faster water absorption. |
| Water becomes cloudy | Change the water completely | Cloudiness is a sign of bacteria. Topping up won't remove it; you need to replace it with fresh water and flower food. |
Common Problems When You Arrange Flowers In A Vase
Problem: My flowers are wilting after only a day or two.
Cause: This is almost always due to a lack of water, often caused by bacteria clogging the stems or simple dehydration. It can also be accelerated by placing the arrangement in a hot or sunny spot.
Solution: First, ensure you used flower food. Second, change the water every 1-2 days, and each time you do, take the flowers out, re-trim about a centimetre from the bottom of each stem, and wash the vase. Finally, move your arrangement to a cooler spot, away from direct sunlight, radiators, or your fruit bowl (ripening fruit releases ethylene gas, which ages flowers).
Problem: The arrangement looks messy or lopsided.
Cause: This usually happens when you arrange flowers without turning the vase, focusing only on the "front." It can also happen if the stems aren't supported by a good foliage base.
Solution: The best fix is prevention—always rotate the vase as you work. If it's already arranged, don't be afraid to deconstruct it slightly. Gently pull out a few stems from the "heavy" side and reposition them to fill gaps on the "light" side. Use taller, lighter filler flowers on the sparse side to add visual weight without physically crowding the arrangement.
Problem: Some flower buds aren't opening.
Cause: Some flowers, like lilies or alstroemeria, are often delivered in tight bud to ensure a longer vase life. Sometimes, they just need a little encouragement or are not getting enough energy.
Solution: Be patient, as they can take several days to open. Ensure they have fresh water with flower food (the sugar in it provides the energy they need to bloom). A fresh cut on the stem can also help. For tight roses, you can gently blow warm air into the centre of the bloom to encourage the outer petals to unfurl.
Advanced Tips for Arranging Flowers in a Vase
Embrace the Rule of Odds
In design, arrangements with an odd number of elements (three, five, seven) tend to be more dynamic and visually appealing to the human eye. Even numbers can look static and formal. When placing your main focal flowers, try grouping them in threes or fives for a more natural, balanced composition.
Play with Colour Palettes
Think like a stylist and consider your colours. A monochromatic scheme (using different shades of one colour, like pale pink, rose, and magenta) is sophisticated and calm. An analogous scheme (using colours next to each other on the colour wheel, like yellow, orange, and red) is harmonious and pleasing. For a bold, high-impact look, try a complementary scheme (using colours opposite each other, like purple and yellow).
Match the Vase to the Flowers
The vase is more than just a container; it's part of the overall design. Tall, slender vases are perfect for long-stemmed, elegant flowers like gladioli, delphiniums, or single lilies. Low, rounded, or cube-shaped vases work beautifully for lush, compact arrangements of roses, hydrangeas, and carnations. As a general guide, the vase should make up about one-third of the total height of your finished display.
How To Arrange Flowers In A Vase FAQ
How often should I change the flower water?
It's best to change the water completely every one to two days. This simple task is the single most effective way to prolong the life of your flowers, as it removes bacteria and replenishes their water supply.
Is flower food really necessary?
Yes, it makes a significant difference. Commercial flower food contains three key ingredients: a carbohydrate (sugar) for energy, a biocide to kill bacteria and fungi, and an acidifier to help the stems absorb water more efficiently. It can easily double the vase life of your bouquet.
Why is it so important to cut stems at an angle?
Cutting a stem flat can cause it to rest flush against the bottom of the vase, severely restricting its ability to drink water. A 45-degree angle creates a pointed tip that can't be blocked and vastly increases the surface area for water uptake.
What can I use if I run out of flower food?
While commercial sachets are best, you can create a temporary DIY preservative. For every one litre of fresh water, add one teaspoon of sugar and a few drops of household bleach. The sugar provides nourishment, and the bleach inhibits bacterial growth.
Final Checklist for Arranging Flowers in a Vase
Before you place your beautiful arrangement on display, run through this final quick check to ensure you've given it the best possible start.
- Vase is sparkling clean to prevent bacteria.
- Stems are freshly trimmed at a 45-degree angle for maximum water absorption.
- All leaves that would be below the waterline have been removed.
- Flower food is correctly mixed into fresh, lukewarm water.
- A structural base of foliage is in place to support the blooms.
- The arrangement feels balanced when viewed from all sides.
- Your chosen display spot is out of direct sunlight, away from drafts, and clear of any ripening fruit.